Lithophanes
This was my original building: part wood, part 3D printed. I only just started printing in 2021, meaning no gigantic items were printed yet, so I could learn from the ongoing process.
.jpg)
You can enjoy the vid I created, with a storyline, as I moved it to my new YouTube channel. I needed a watermark for copyright and my previous channel did not offer me one. This channel is not monetized.
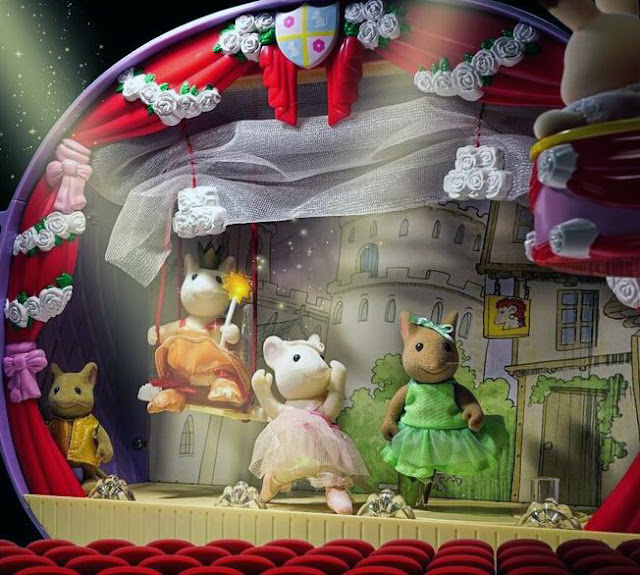
My Sylvanian combo Angelina Ballerina theater fell apart in 2024, as the wood must not have been dry when it came from the store. Very sad, but I saw it as an opportunity to create an even better theatre. I figured now that my designing + printing skills are much better than in 2021, I can make everything out of plastic, bringing in much better detail than before.
I created a humongous model, it will be just over 7 feet long and over 2 feet wide. Lots more going on than in the original one! But, I only printed small details for it, as there is no way I want to drag a gigantic model to another country once we move in a few years.
I used up almost all the filament I had, as it becomes brittle over time, as I explained in previous blogs, even though I have a filament dryer at hand. No use even to keep it airtight and with desiccant till I can print the lot.
I already used the Angelina Ballerina original drawings as an inspiration before, not only in shaping the building itself, but as in adding a nice detail. I did that now agai, but even better. Even though the teatre will fit right into the Town series, it still fits in with the Angelina theme as well.
I will not use the carry-on theatre from Angelina in future. It's partial made from cardboard and the doors made it hard to use. But, the original store-bought theatre has a beautiful background at the backend of the stage. It's cardboard, so it's just flat ... I did scan it in though to preserve it. I decided was to replace the artwork inside the theatre with plastic as well, using a neat trick.
It would have been easy to create a shadow box, meaning a homemade 3D paper version. You print it multiple times in the best quality, preferably on photopaper these days, make it 3D by repeating cut parts on top of each other if I was still physically capable of doing so. That was a popular hobby in Belgium and The Netherlands a few decades ago. The artwork of Anton Pieck was everyone's favorite back then. It got spray lackered to finish it off. Here's an example. Many friends asked me to create one for them, especially this one.

But, it's still paper and I am not a fan, as it falls apart, fades, goes sloppy, etc. Plus, no way I can do that these days, I'm too disabled for such detail work.
I figured I would look into lithophanes. It's a means of letting light shine through a 3D image to transform it into a lively scene. It looks flat on first sight, but once the light pops up from behind ... wow! Here's an example of light off on the left, light on on the right. Neat, huh!

You could use it to create mini wall lights, ceiling lights, or picture frames for our little Sylv friends. Or even complete backgrounds. It can also be done in multiple colors. But, for the setup I plan, I needed an off white only.
My future printed theatre stage has slots, so background panels can go in, one after another, to create a real 3D effect. It's a model I bought from Fulv, a 3D designer, which I adapted for my needs.
This is the original Angelina Ballerina theatre backdrop scan I have.

I split it into 5 buildings with Photoshop, and asked the program to fill in some gaps, by using AI. Here's an example. You can spot the differences with the original building.

I was lucky that my 3D printer has it's own free lithophane creator software, but general ones exist too. I thought if I removed the white background in Photoshop, it would not create that, but it saw it as black and creathed the tickest part in the 3D model, so I had to revert back to the white sky.
.jpg)
.jpg)
.jpg)

Wow, fascinating! I had no idea that lithophanes existed!
ReplyDeleteGlad to show something new to you! Thanks!
Delete