I decided to gather all relevant info and examples I had about 3D printing since I started with the hobby in one blog, as many people are interested and it became too scattered. I discarded a lot of the old blogs about 3D printing, because loads of info became obsolete.
To be honest: if you don't like fiddling with software, can't stand computers being stubborn, have little tech patience, can't stand failures after everything going well, meaning if you hate troubleshooting, don't buy a 3D printer just yet! Although the first reasonably less-trouble printer finally is out since a year, it still requires basic knowledge on how to fix issues. I am pretty sure this will improve even more in a couple of years, so 3D printing should become as easy as using a microwave. But, we are not there yet at the end of 2023.
I waited well over 10 years before I bought my first 3D printer in 2021, once I was sure I could handle it, and deal with the extra grey hairs!
You have to love tweaking software to perfection, or it will be a big disappointment and source of aggravation. You have to love troubleshooting from scratch, with often no indication on what went wrong. Even hub, who is an IT expert in his own niche, said he would never even bought one and use it himself, if I didn't come so prepared beforehand. He says all that worrying drives him nuts.
Patience, you will need loads of it. For example, it took 5 full days to get flexible filament printing properly, after tons of research, software tryouts, troubleshooting, and tweaking my design to make it look decent. 5, yes, you read that right. Enough to eat your shorts in despair!! Even I have cried out of despair more than once, it can be that hard to get a printer going!
Clogged nozzles, shifting prints, oozing, creating bird nests instead of prints, identical prints suddenly no longer succeeding whilst nothing changed, it still is a steep learning curve. I am not keen of resin printers, because of my allergies and the toxicity of the process. Extrusion printers, called FDM printers, had to be it.
But, it also offers me a new source of miniatures, especially after the tax laws on non-EU items in Belgium suddenly drying up my affordable market to 1% at best, and for items I could never find in the first place. And, finally, design my own stuff. Gasp!!
First thing to do before getting one, was to master the basics of the required software to be able to print most of the ideas I could come up with. This means, for example, basic editing of existing free models, transforming models to a suitable size, working with various free online tools, learning how a 3D printer works in detail, especially troubleshooting the software and physical printer as well. And, lets not forget, loads of info on your own personal choice of printer. I learned a lot on YouTube.
You do not need to learn how to sculpt 3D objects yourself from scratch to enjoy 3D printing to start with. It's also best to start with a cheap decent rated 3D printer, to learn, and after a few years move onto a pricier model. I would advise to buy one on Amazon or a company with guaranteed excellent refund rules, as certain brands are so bad at customer service, that this is the only way to get refunded, as happened twice in my case after a printer was ruined by power outages, which they should not have killed them.
Start with printing small objects first, as that is the only way to grow into bigger prints, by learning about the failures.
As for myself, I have now reached a point where I would prefer a big print bed with a multicolor tool, on a core XYZ printer. That style printer is new and much faster. I want to be able to print a model up to almost 14 inches in all directions, at a high speed, in colors. As I never print at night for safety reasons, that would help me a lot. Also, I am fed up gluing small parts together and creating separate models for colored parts. All in one go makes it very sturdy. Bigger parts to glue together gives an option to create pegs, to makes them fit together so well. Pegs are dead easy to add these days in the program which tells a printer what to do with a model, called "slicer".
There is not one big printer out there yet that I would buy yet, not one in sight either, and I never buy a totally new design in version 1 either, so my print jobs are on hold for now. Not even for the next upcoming years, I fear, so my current printer will only serve minimal till then.
But even in a few years when there is one I would buy, I will also be close to moving to a better climate, so it will even have to wait till after the move. Reason is that I have 3 humongous ideas in my head to print by then and not keen on moving them. I come well prepared to move well in advance. Here's an old blog about it:
AI is moving ahead fast, it can already create 3D objects from a simple picture of an object, and create simple objects from text! I was gathering my courage to improve my designing skills even more, but as soon as the first AI tool came out, I cancelled that idea. Give it a few years and it will just improve so drastically, those skills won't be needed anymore for the average user.
Photogrammetry and 3D scanners:
I am keeping my eyes peeled on 3D scanning techniques.
Actual 3D scanners are pricey, and frankly, the cameras are often worse than most smartphones. The result is still not that greatly detailed for miniatures yet in 2023.
I tried many free photogrammetry apps with decent reviews, to scan using the camera on your phone. The result was either low poly (blurry), there was a lot of noise (extra artefacts), many incorrect edges, lacking detail, had holes, lumps, bumps, warping, etc. I can clean up 3D models in MeshMixer and TinkerCad, but it still has to look somewhat decent to start with.
Here are some of my 3D prints:
Xmas decorations and hats for my Christmas shop.
Canoe for my dressed up Sylvanians.
These messy babies spilled ice cream!
File maps for my Help Center. This was a homemade design starting from a simple map.
Walls which serve as floor level supports in my shops. Here is a pearl colored one.
Pink railings: a picture converted to a 3D model. These days, AI can do that for you easily. Back then, it took some fiddling.
Pillars. I printed varied styles in correct sizes.
Tree stand. Easy self made design in Tinkercad. Brown would have been a better color, lol.
My Diner marquee and sign. To refresh your memory, the original marquee was made from layered plasticized paper stuck to a large bottle cap, and my sign was made from silicone caps, metal letters stuck onto plasticized paper. It all kept falling apart, the paper was too sloppy and the bottle cap was too heavy. I created a 3D print from pictures manually, no AI existed then yet to do so. Much, much better!
My thin cut plastic curved table with 3 wooden legs glued onto it also fell apart due to the weight on top. It curved to fit around the kitchen counter. I scanned it, cleaned the scan in Photoshop, converted it to a 3D object manually and printed it in a minty color with legs.
Various vases and pots, which went into my Flower Shop's back end. The shelves were printed as well.
Lab breweries in copper ...
... and silver.
Curio with decorations. Homemade design.
Torii (gate), bench and pagoda.
Moon bridge.
Lanterns.
My own designed bamboo bonsai wall.
Pagoda to match the resin gate at it's back, an aquarium decoration I bought.
Torii (gate).
A bridge for my bonsai garden. It has a dark brown grain in it, it looks a bit like granite. the grain is not visible on the picture though.
Printed PLA filament leftovers into a cave and made a short cute vid:
Curb pieces made to fit the sidewalk, using the same top decoration as the standard Sylv curbs, and printed in a color which came close.
Toy chest. I was looking for one to print, when I stumbled onto an exact replica of the one my dad made for me as a toddler. Mom sold it without my approval, as I was not allowed to disagree, so this definitely brought a tear to my eye!
A fifties style rescue squad truck. Not a fire truck, as my Sylvs don't have big fires, but they can get into a bit of a pickle sometimes, lol.
I decided to keep my rescue squad truck, as there is no better alternative, so I printed a logo for each door.
One of my friends, whom I have known since we were kids, had a lovely mom. She did me a huge favor once, and I never forgot about that. I loved her old radiators, whom she had restored, so I printed some to remember her by in the same color as she had. We have the same type here, by the way, and I love them as well.
Mini "benchy" boat (a test print for 3D printers) for the kiddie pool. Extremely hard to print so small, so happy that it succeeded well.
2 tiny spooks for my spooky mansion. These are printed ultra thin, to make them look more ghostly. And some more scary pumpkins, plus a hat an glasses for my Cousin Itt. And yes, there is an actual Sylvanian underneath!
Kiosk. I printed the cash register, table, doors, the bookcase, all the card and magazine stands as well. Embellished the prints with cards, magazines and newspapers are printed on glossy photopaper, added Sylvanian and other miniatures. I added a hairband LED at the top. The utterly cuteness overload Frenchies make it complete!
A greenhouse, sundial, well, cold frame and water pump. Custom-made garden wellies to fit their feet, printed in a flexible green TPU, which printed so well, from a brand called SainSmart. These make them stand on the grass so well!
My sister from another mother suggested that JollyOaksField needed a post office. Brilliant idea! Tweaked some designs and slapped them together.
My public phone town building.
Public loo.
House of Art. I created plaques with text, to name the art works, though that will be hard to read on pics, so I will add the text of each for you to read. Most refer to an idiom, one to a famous painting, one to a famous architect, and one is a word gag.
Dust gathering bunny / Dear Deer / Can you look a gifted zebra in the mouth?
Storm leaving the teacup / Gaudy Gaudi Butterflies / Vase holding air
This is not an apple / Apple fell far from the tree.
I wished I had this sooner, it makes life a lot easier. Despite trying to name a file as best descriptive as possible, it's much easier to retrieve one in a list, if you can actually see what it is. Here are the source-codes:
https://github.com/unlimitedbacon/stl-thumb/releases
If you don't use this, you will have to check each saved STL file (the printable file) in 3D viewer, which comes along with Microsoft Windows 10/11. If it doesn't open, the file is corrupt. It happens sometimes when you export a file as an STL. However, if this tool can pull a thumbnail (mini view of the file in Explorer), the file is not corrupt. This saves extra work!
The software that tells your printer how to handle a chosen object, is called a slicer. My personal preference has been Cura up to 2024, because of their excellent tree supports. You can throw your print model in the slicer program and it will tell you exactly how many grams of filament will be used. Make sure you have extra for when a print fails.
I prefer Cura tree supports over the ones from Prusaslicer, just a personal choice.
You printer needs to be setup in a draft free spot with a room temperature which stays almost steady during a print.
Setting the filament temperature is the basis of a decent print, as is leveling your printbed. Some people print a temperature tester for their filament, several models can be found for free on Thingiverse or through the Yeggi search engine. I never have printed one, as I only buy limited quantities of filament and just try a small print with it first, which tells me if the temp is OK. It's usually fairly close to factory indications.
Tryouts, as in printing a Benchy below, a well known free object for fanatics, to test the skills of your new printer and your personalized settings for it, for example.
Don't print large objects to start with, try a new setting on a small one. Don't change many settings before you tried each one first, or you will end up not having a clue what goes wrong. Go and check the printer regularly when you change settings, to prevent a disaster.
I had filament being tangled in the middle of a roll, for example. This rarely happens, as I always use the "tip of the finger to the tip of the filament start" at all times handling it. If you don't use that trick, you will get plenty of tangles, rest assured. But, I had a few rolls so far in over 2 years which still were tangled due to something happening at the production line.
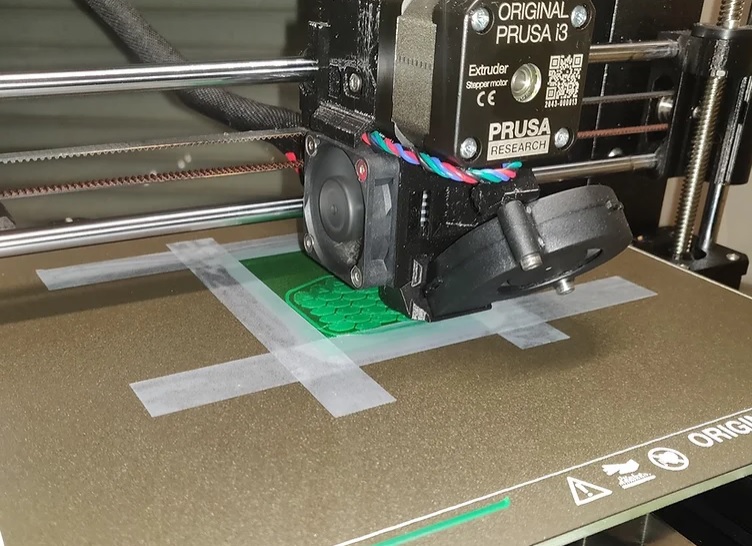
Trying to cut costs on saving on filament ends up in adding costs. Regarding miniatures, it is well worth printing on a raft, meaning a detachable large surface, which comes off easily after printing, or at least a brim around the object, otherwise chances are big that the print detaches from the build plate and you have to start over.
If a raft starts to detach from the build plate, pause the print and tape it onto the build plate. Watch your fingers, as build plates can get hot, as programmed. Nozzles are immensely hot too.
Personally, doing home printing of miniatures, I prefer doing it using a small extrusion, meaning fine print, at a lower speed, to get the best looking results. The smaller the layer height, the better it looks.
A filament dryer is an absolute must in wetter climates and inside homes where cooking goes on close to the printer, as in my case, as filament absorbs water like crazy and it causes stringing on the printed surfaces, meaning a lot of thin hair like strings all over the place. Once printed, the chemicals plastic stops absorbing water.
Having a tool box with tools used for the printer only, as most comes along with the printer, is a must too, a lifesaver, lol!
Stringing is most likely to happen just a tiny bit when you print miniatures, like tiny cobwebs attached to your print. Using a small flame fast, swift, in a wave motion, carefully, will remove them from your print.
Printer maintenance, calibration, recalibration, lubricating, dusting the debris, it's a must!
Also, sometimes a print just fails, even if all possible causes are looked at and you resliced the model just to make sure, as slicers too can sometimes create an error. Bad design, an unknown error in the file, looking for a replacement file is the only option left.
You can't print mid air, so supports are it. I prefer the style of tree-supports any day! They save on filament use and remove easily!
I don't do prints that take over 18 hours, a personal choice. Safety during sleep comes first. Plus, I do not want to end up with a bird's nest, like this one. This is a small one, after 1 hour, but 8 hours of sleep creates a nest for a stork, lol!
It's worth buying a bag of rechargeable silica gel bags, to store filament in plastic bags or containers. These bags can evaporate moisture in an oven if they become too moist eventually. They change color when they are too moist, to indicate a drying period.
Now, as far as 3D printer filament goes, there are plenty of options, from various plastics, even wood. For now, I am only interested in high detailed printing with PLA or flexible a bit less detailed material called TPU, both non-toxic. PLA is supposedly biodegradable. Cheap plastics also might contain nasty stuff that stinks, which is most likely toxic inside a home, or contains impurities, which clog up your nozzle. I always buy 4 star ratings and read what the 1 star ratings of that filament say. If several people complain about a rpint detaching, I won't buy it.
I personally never print with plastics which need enclosures for toxic fumes.
PLA is brittle till it is printed. Remove dust from the printer on a regular basis, as the filament tends to tag it along and it causes problems. PETG would be a better choice to print, still OK regarding fumes and health, but the choice of colors is limited up to now, although it's improving.
Settings to print filament differ with type of plastic used and is also brand specific, so you need to check before you start.
Apparently, cleaning PLA filament exists. I was amazed how much crud came out after a nozzle! I load-unload this PLA 3 times before using a new filament roll.
I bought a "No Clogger Tool". https://noclogger.com/ to use it as a last resort to get a very stubborn clog out.
Dissolvable PLA exists too. No more hassle to get supports off in a multicolor printer, although it adds to printing time by swapping filament.
Useful free programs with great online YouTube tutorials: MeshMixer, Blender, TinkerCad. Great YouTube channels are MakeWithTech and Maker's Muse.
If you have a specific problem with your printer, the Facebook pages of your printer are helpful.
Printing anything rounded, like vases, bowls, lamp shades, etc, is done best in "vase mode", which uses the spiralize setting turned on. It looks better, yet results in a more frail print.
Miniature prints get sturdier when you increase your wall line count to 3.
Most human sized object designs can be rescaled to a miniature. You will be amazed how well this works when printed in a fine setting. You won't be able to control yourself printing vases, pots, etc!
I love lightning infill, which literally only puts infill in places where it is needed, and keeps the strength. It saves a lot of filament! Yet, if you need a bottom heavy object, don't use it, as it will topple over.
Printed on taped down organza to produce a flexible item, for examples animal scales, works well too! Below is the start of a dragon scale cape for my Sylvs!
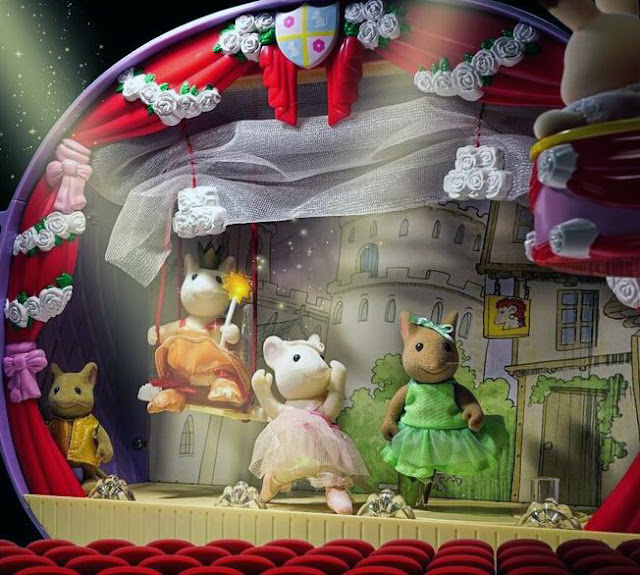
Again, a compilation about a series of blogs I made about this topic, after extensive research, compiled to offer relevant data only, and improved it even a bit. I split all the data over 2 blogs. I discovered the Angelina series in 2021 after I already collected a lot of Sylvanian Families and fell in love with them instantly. You can see the likeness to Sylvanian, but they are not real ones. Yet, they do are related indeed, as you will find out! T his is blog will deep dive into the origins, the next blog about my crafting. Flair (UK toy company since 1999) took over the production of Sylvanian Families in the UK in 1999/2000. Up to then, Epoch only produced Sylvanian Families in Japan. In 2013, Flair transferred the rights for the UK toys to Epoch UK. Flair released the Angelina Ballerina sets starting from 2003, yet claims to have no more info on the series, after contacting them. Through the help of some members of the Sylvanian forum, and lots of online research, I gathered more ...
My diorama setup for after we move in a few years is already planned. It's done in a way that I can do a straight line, an L of U shape, or even divide it up in 2 or 3 pieces. I had a small spot in the Town part that was empty. I have stuff to put in it, but those are single items that I can put elsewhere. I was hoping to get an idea to print something for it. But no more stores, and it had to fit in the theme, yet be different. Then I spotted a new 3D print design from Fulv, who offers affordable designs: a tram station! I already have a Sylvanian tram stop sign, trams, lanterns, and park benches and that would just complete this perfectly at the other end of JollyOaksField town. It had to be adapted to fit in my empty spot. I also swapped parts with one of Fulv's previous designs, like the flowers and rooftop ornament grids. I spent a few days adapting his models to fit my needs. His tram got sliced up and altered to become a pram tram, inspired by the Sylvania...
My Google account offered me free use of Nano Banana Pro AI, so I instantly put it to good use. Please comment on my blog which families you would like to see yourself in future, and which ones of my suggestions would you certainly buy if they were available. Enjoy! Let's hope Epoch will actually see this and become inspired! Platypus Hippo Zebra Dolphin Butterfly Turtle


.jpg)


.jpg)


.jpg) I decided to keep my rescue squad truck, as there is no better alternative, so I printed a logo for each door.
I decided to keep my rescue squad truck, as there is no better alternative, so I printed a logo for each door.


.jpg)
.jpg)
.jpg)
.jpg)
.jpg)
.jpg)
.jpg)
.jpg)
.jpg)
.jpg)


.jpg)
.jpg)
.jpg)
.jpg)
.jpg)
.jpg)
.jpg)
.jpg)
.jpg)
.jpg)


.jpg)

Comments
Post a Comment